In the March issue of BTM, I discussed some of the differences between the top players in bowling and players who are looking to improve their game. In this month’s article, I would like to give more detail about what separates the top players from those who tend to continue to struggle with all phases of an oil pattern: the fresh, transition, or when the oil pattern breaks down completely.
There will be some options on what to work on with your game so you can manipulate the ball roll. First, I would like to bring up a subject that is debated quite a bit in bowling. Which comes first: having the proper “feel” in the sport of bowling or understanding the “environment” of bowling to develop the proper “feel”?
In my opinion, the answer is that one connects to the other and both are equally important in order to be able to compete at the highest level. You must be able to adjust your “feel” to excel on any oil pattern, while others around you struggle. With that said, let’s get right into a few things you can add to your physical game to increase your skill.
The common mistake is that most players who struggle on different oil patterns have the idea that they only need to learn to perfect one type of physical game and the only adjustment they make is to change bowling balls. Please don’t misunderstand what I have just stated there. Different bowling balls can help, but in order to take full advantage of them, you need to have many physical adjustments with your game. One of the most common physical game adjustments all top players possess is the ability to use different types of loft. Here are a few you can add to your physical game arsenal.
Onto the lane
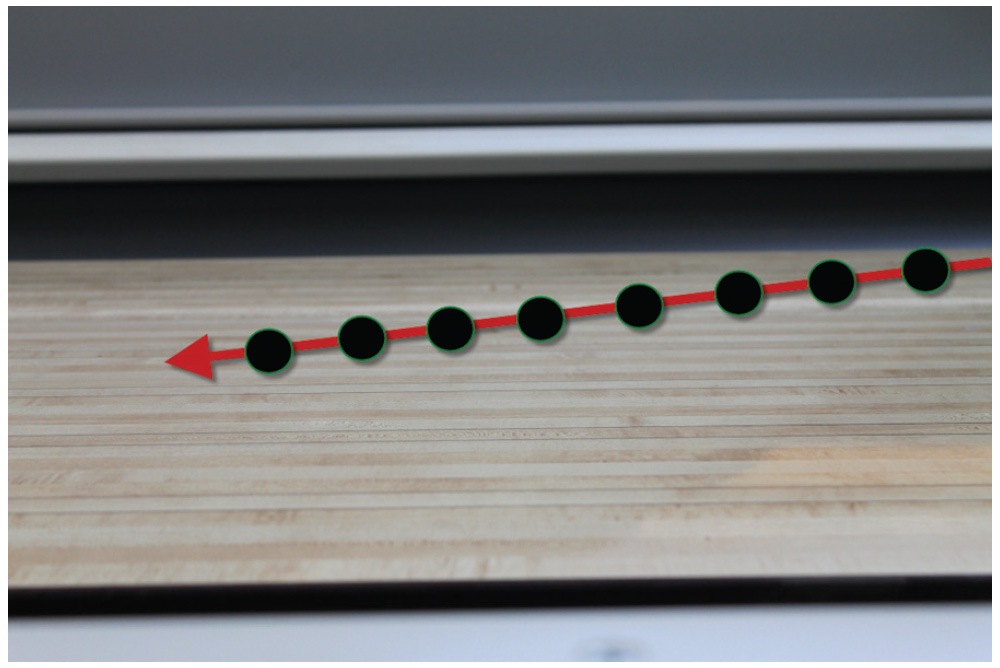
As you look at the photo (Onto the Lane), you will see a red arrow with black circles on it. This type of loft puts the ball “onto the lane” and is used by every player regardless of style. For example, Norm Duke, as a predominantly straight player, uses this type of loft quite often. It allows him to lay the ball down on top of the drier part of the lane in the heads so the ball can push through front of the lane. He doesn’t want the ball to read the dry part of the lane early.
On the opposite side of the spectrum of that type of loft is Chris Barnes. Chris is a “power stroker” with high revolutions on the bowling ball. He tends to use this type of loft so he can lay the ball down in the slicker part of the oil pattern in the front of the lane so that the ball accepts the heavier oil in the heads and doesn’t squirt out and away from his intended ball path.
Arc loft
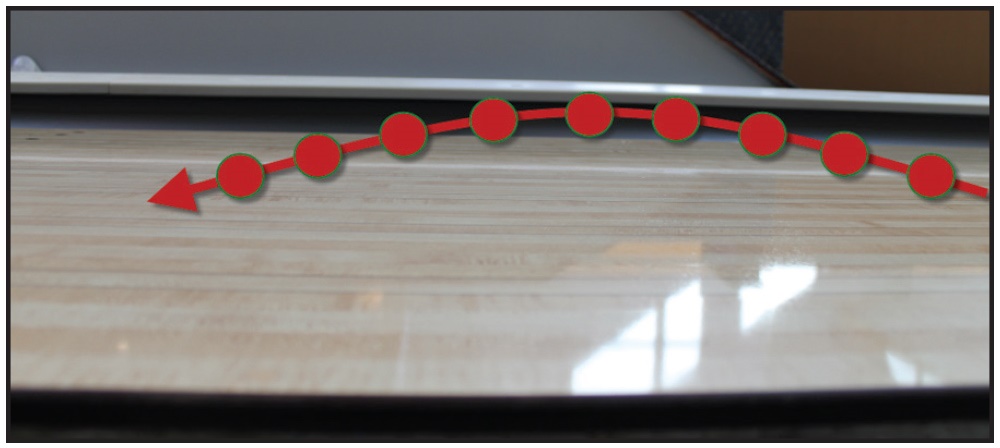
As you look at the second photo (Arc Loft With Ball), you will again see a red arrow but this time the loft shape is indicated with the red circles on top of the red arrow. This type of loft is used by virtually every top player for very different reasons. Bill O’Neill, a predominantly straighter player, is phenomenal controlling and using this type of loft from every part of the lane. He uses it when he wants to create a straighter ball path down the lane and a soft arc on the back end. On the other side of that spectrum is Danny Wiseman. Danny is a power player and yet he uses this type of loft to get the bowling ball to read the lane earlier and to create a sharper angle at the back end.
Steeper angle
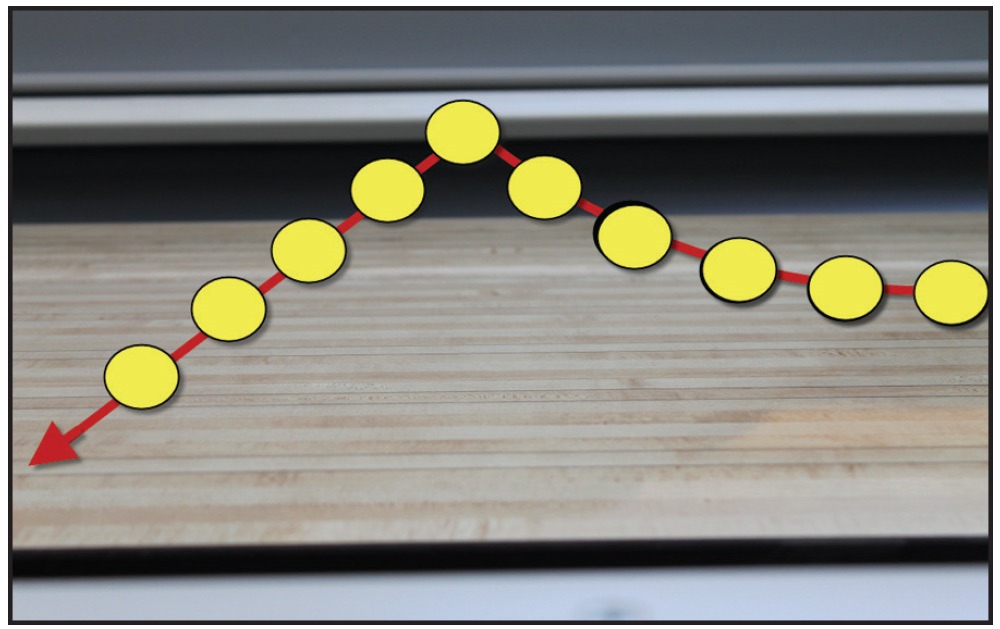
Moving to the third photo (Steep Angle), you will see a red arrow with yellow circles outlining the shape of this type of loft. Different players use this loft shape to create different ball reactions on the lane. Walter Ray Williams, a predominantly straight player, uses this type of loft when he is trying to create a more overall hook. Conversely, Jason Belmonte uses it when he needs to create more skid to get the ball further down the lane before it reacts.
So far it is easy to understand that different bowlers use different loft shapes to create different ball motion on the lanes, regardless of what phase the oil patterns are in. Before delving into a little more detail about different loft shapes, there is one more loft shape I would like to discuss.
Bouncing
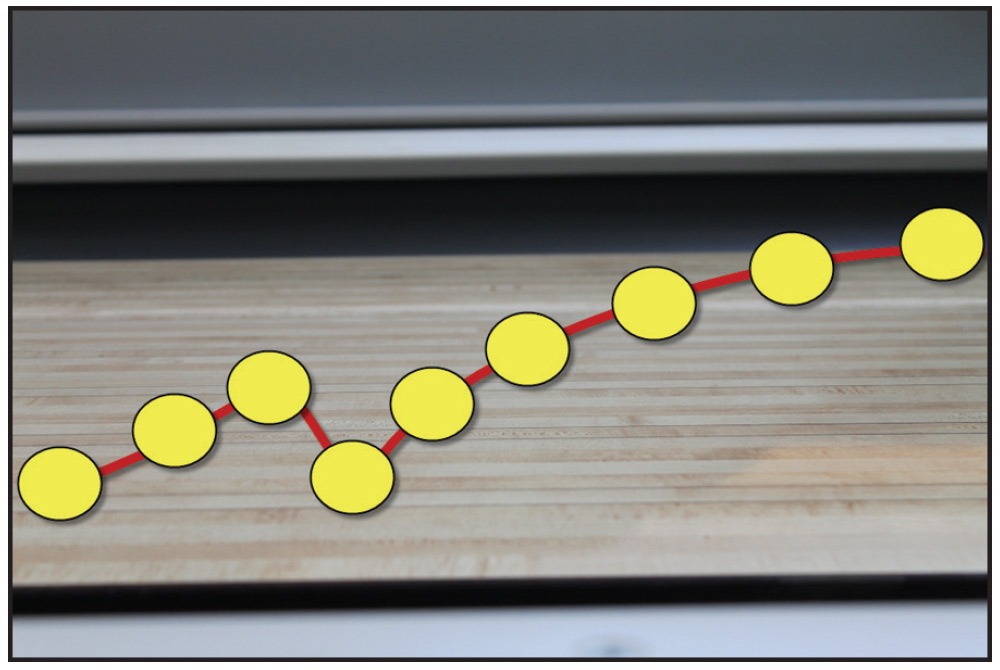
In the “Bounce” photo, you will see the shape of the loft as indicated by the red arrow along with the yellow circles on it. You will also notice something a little different with this loft shape. At the end of the arrow, the shape goes up, then down, and then back up again. The upward movement of the bowling ball is when it has bounced. This bounce is not something that I recommend for a player to intentionally try to create.
However, as you learn to incorporate different loft shapes, the bounce might happen until you learn how to create the shape that you desire. Sometimes, even after you have properly executed the loft technique, a bounce might occur. As long as the bounce is minimal and controllable, loft can still be a very effective tool to use. In order to have an even better understanding about how to use loft shapes, it always helps to have some guidelines as to the distance of loft that you are trying to achieve.
How far should I loft it?
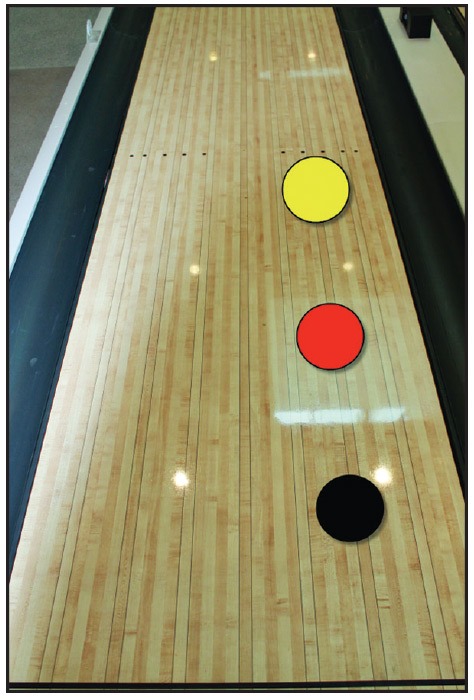
In the photo labeled loft distances, the different color circles are color-coded to fit the loft shapes that have been described.
- The black circle on the lane represents the distance of loft that matches up to the “onto the lane” ball loft. It is approximately two feet past the foul line.
- The red circle on the lane represents the distance of loft that matches up to the “arc loft“ and is approximately four feet past the foul line.
- The yellow circle on the lane represents the distance of loft that matches up to the “steep angle” ball loft and it is about six feet past the foul line.
Different ball paths
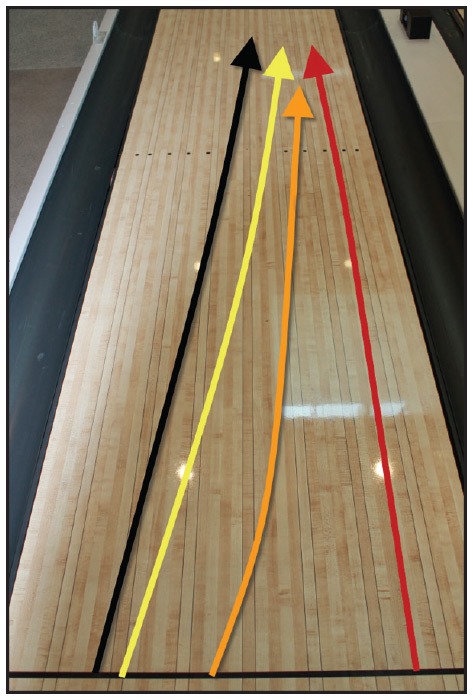
Once you feel you have perfected each type of loft, it is time to use them on different parts of the lane. The different paths photo is a guideline as to which parts of the lane you should practice each and every one of the different loft shapes.
I would recommend that in the beginning you use the different loft shapes on the part of the lane you play most often. This will give you an idea as to what each loft shape does for you. As I discussed earlier, each loft shape is used by different styles for very different reasons and in order to avoid confusion or frustration, it is best to learn what they do for you systematically starting from where you normally play the lanes, and then moving to extremes on each part of the lane, while incorporating the different loft shapes.
Another suggestion I would like to make is that you practice this technique on different oil patterns. As the wise legend Earl Anthony once told me, “It is better to learn how to do things in practice, so that you can use them in tournaments.” It’s not only more effective that way; it is a lot cheaper to learn it in practice than in tournaments. Another thing to do when you practice with this technique is to use only one ball until you feel confident with the technique.
Once you are confident with your abilities, start using different balls so that you can learn how these techniques affect their reaction. If you have a practice buddy and both of you are working on this technique, do not try to get the same look or characteristic as your buddy. It is much better to make your practice time more efficient by having your buddy help you judge the different types of loft shapes and the distance.
It’s a wrap
This is not all the information you need to know and understand about different loft shapes and distances. Each player is going to find out just how differently these techniques work for them. The main thing is to take one or two of the techniques described in this article and work with them first. At a later time start to work with the other types of loft shapes. Learning what each different loft shape does for you will be invaluable.


