Article Contents
- 1. High track layouts
- 2. Low track layouts
- 3. Lower track layouts
- 4. Very low track layouts
- 5. Full roller layouts
- 6. Bonus full roller layouts
- 7. It’s a wrap
Note: This article is only available to Bowling This Month subscribers.
The league and tournament seasons are now in full swing and most likely many of you are getting ready to drill a new piece of equipment for either your league or your upcoming tournament competitions. I would like to give some advice on layouts I find to be the most consistent based on the way you “track” the bowling ball. Just in case you may not be completely sure of what a track is, I will also explain that in this article.
Even though some of you will be looking for the technical explanation for the reasons I like these particular layouts, that’s not what this article will be about. This information is based on my experience of what works for most players.
A ball track is determined by the location of the first oil ring in relation to the finger and thumb holes. The first ring produced is usually the one closest to the thumb hole. As an example, I have drawn a dotted line on this track in the photo labeled Ball Track. This track is considered high because it is about 1 to 1 1/2 inches from the finger and thumb hole. That’s where we will start in the category of ball layouts.
High track layouts
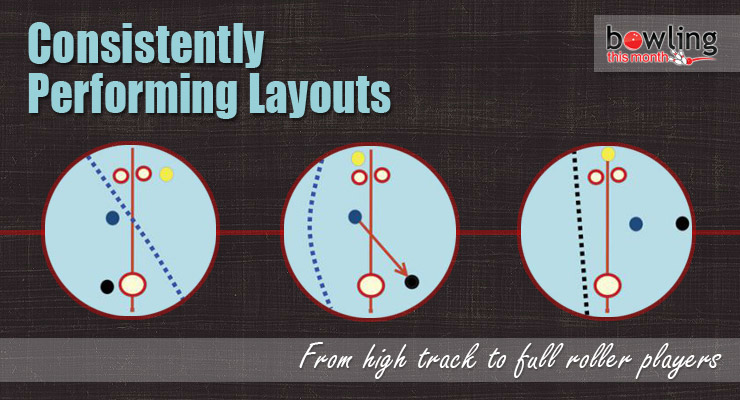
For a high track player, one of my favorite layouts is as shown in the photo labeled High Track Layout. This is for a ball that does not have the mass bias marked on it or that has a symmetrical core.
- Place the pin above and between the middle and ring finger as indicated by the yellow dot.
- Kick the Center of Gravity (CG) approximately two inches right of the grip’s centerline as shown by the blue dot.
- Drill a balance hole one inch below the axis point.
If a player is to use an asymmetrical core that has the mass bias marked, the ...
Already a premium member? Click here to log in.


 (Only
(Only 